C. Making and Using AprilTags
At the moment, the only tags supported by TagSLAM are the popular AprilTags.
What tag family to use
The AprilTags come in several different variants (families), depending on how many bits a tag can represent. Some tag families have large, coarse bit blocks that can be seen from far, but can only cover a small number space. The most popular one is the family “36h11”, which has a 6x6 bit pattern. It can cover the numbers 0 to 586, and is rather robust to false positive detections. If you don’t need the full number space, and must work with a lower resolution camera, consider the “16h5” family, which can represent 0 to 29. Be warned however: you may have more false positive detections when using this tag. This means the AprilTag library may mistake some rectangular objects on the image as tags! This can be a real nuisance when using TagSLAM.
 |
 |
|---|---|
| Tag family 36h11 (preferred). Small blocks, harder to detect, can represent larger numbers. | Tag family 16h5. Large blocks, better visible, but susceptible to false positives. |
What material to use
An ideal AprilTag should be:
- perfectly flat, without any warp
- matte (not glossy!)
- high contrast: pitch black on pure white
- rigid and sturdy
- light weight
Here are two popular options: foam core board (left), or DiBond aluminum (right)
DiBond aluminum
For very sturdy tags, consider having them printed on DiBond aluminum, a material used for making advertisement signs. The company FoamCorePrint.com has been used for this before, although they only allow 1/4” thick material for matte, their 1/8” boards only come glossy and you must specify explicitly that you want it matte, and no rescaling of the image. If you want the thinner boards, Printmoz also has been used successfully before (uncheck the option for glossy cover paint).
You must supply the printing company with a pdf that exactly fills the size of the board. For a 12"x12” board, the cost is currently about \$15 without shipping. The material is quite heavy, so not easily attached to walls with duct tape. However, it’s very rugged and weather resistant, i.e. suitable for permanent installation outdoors.
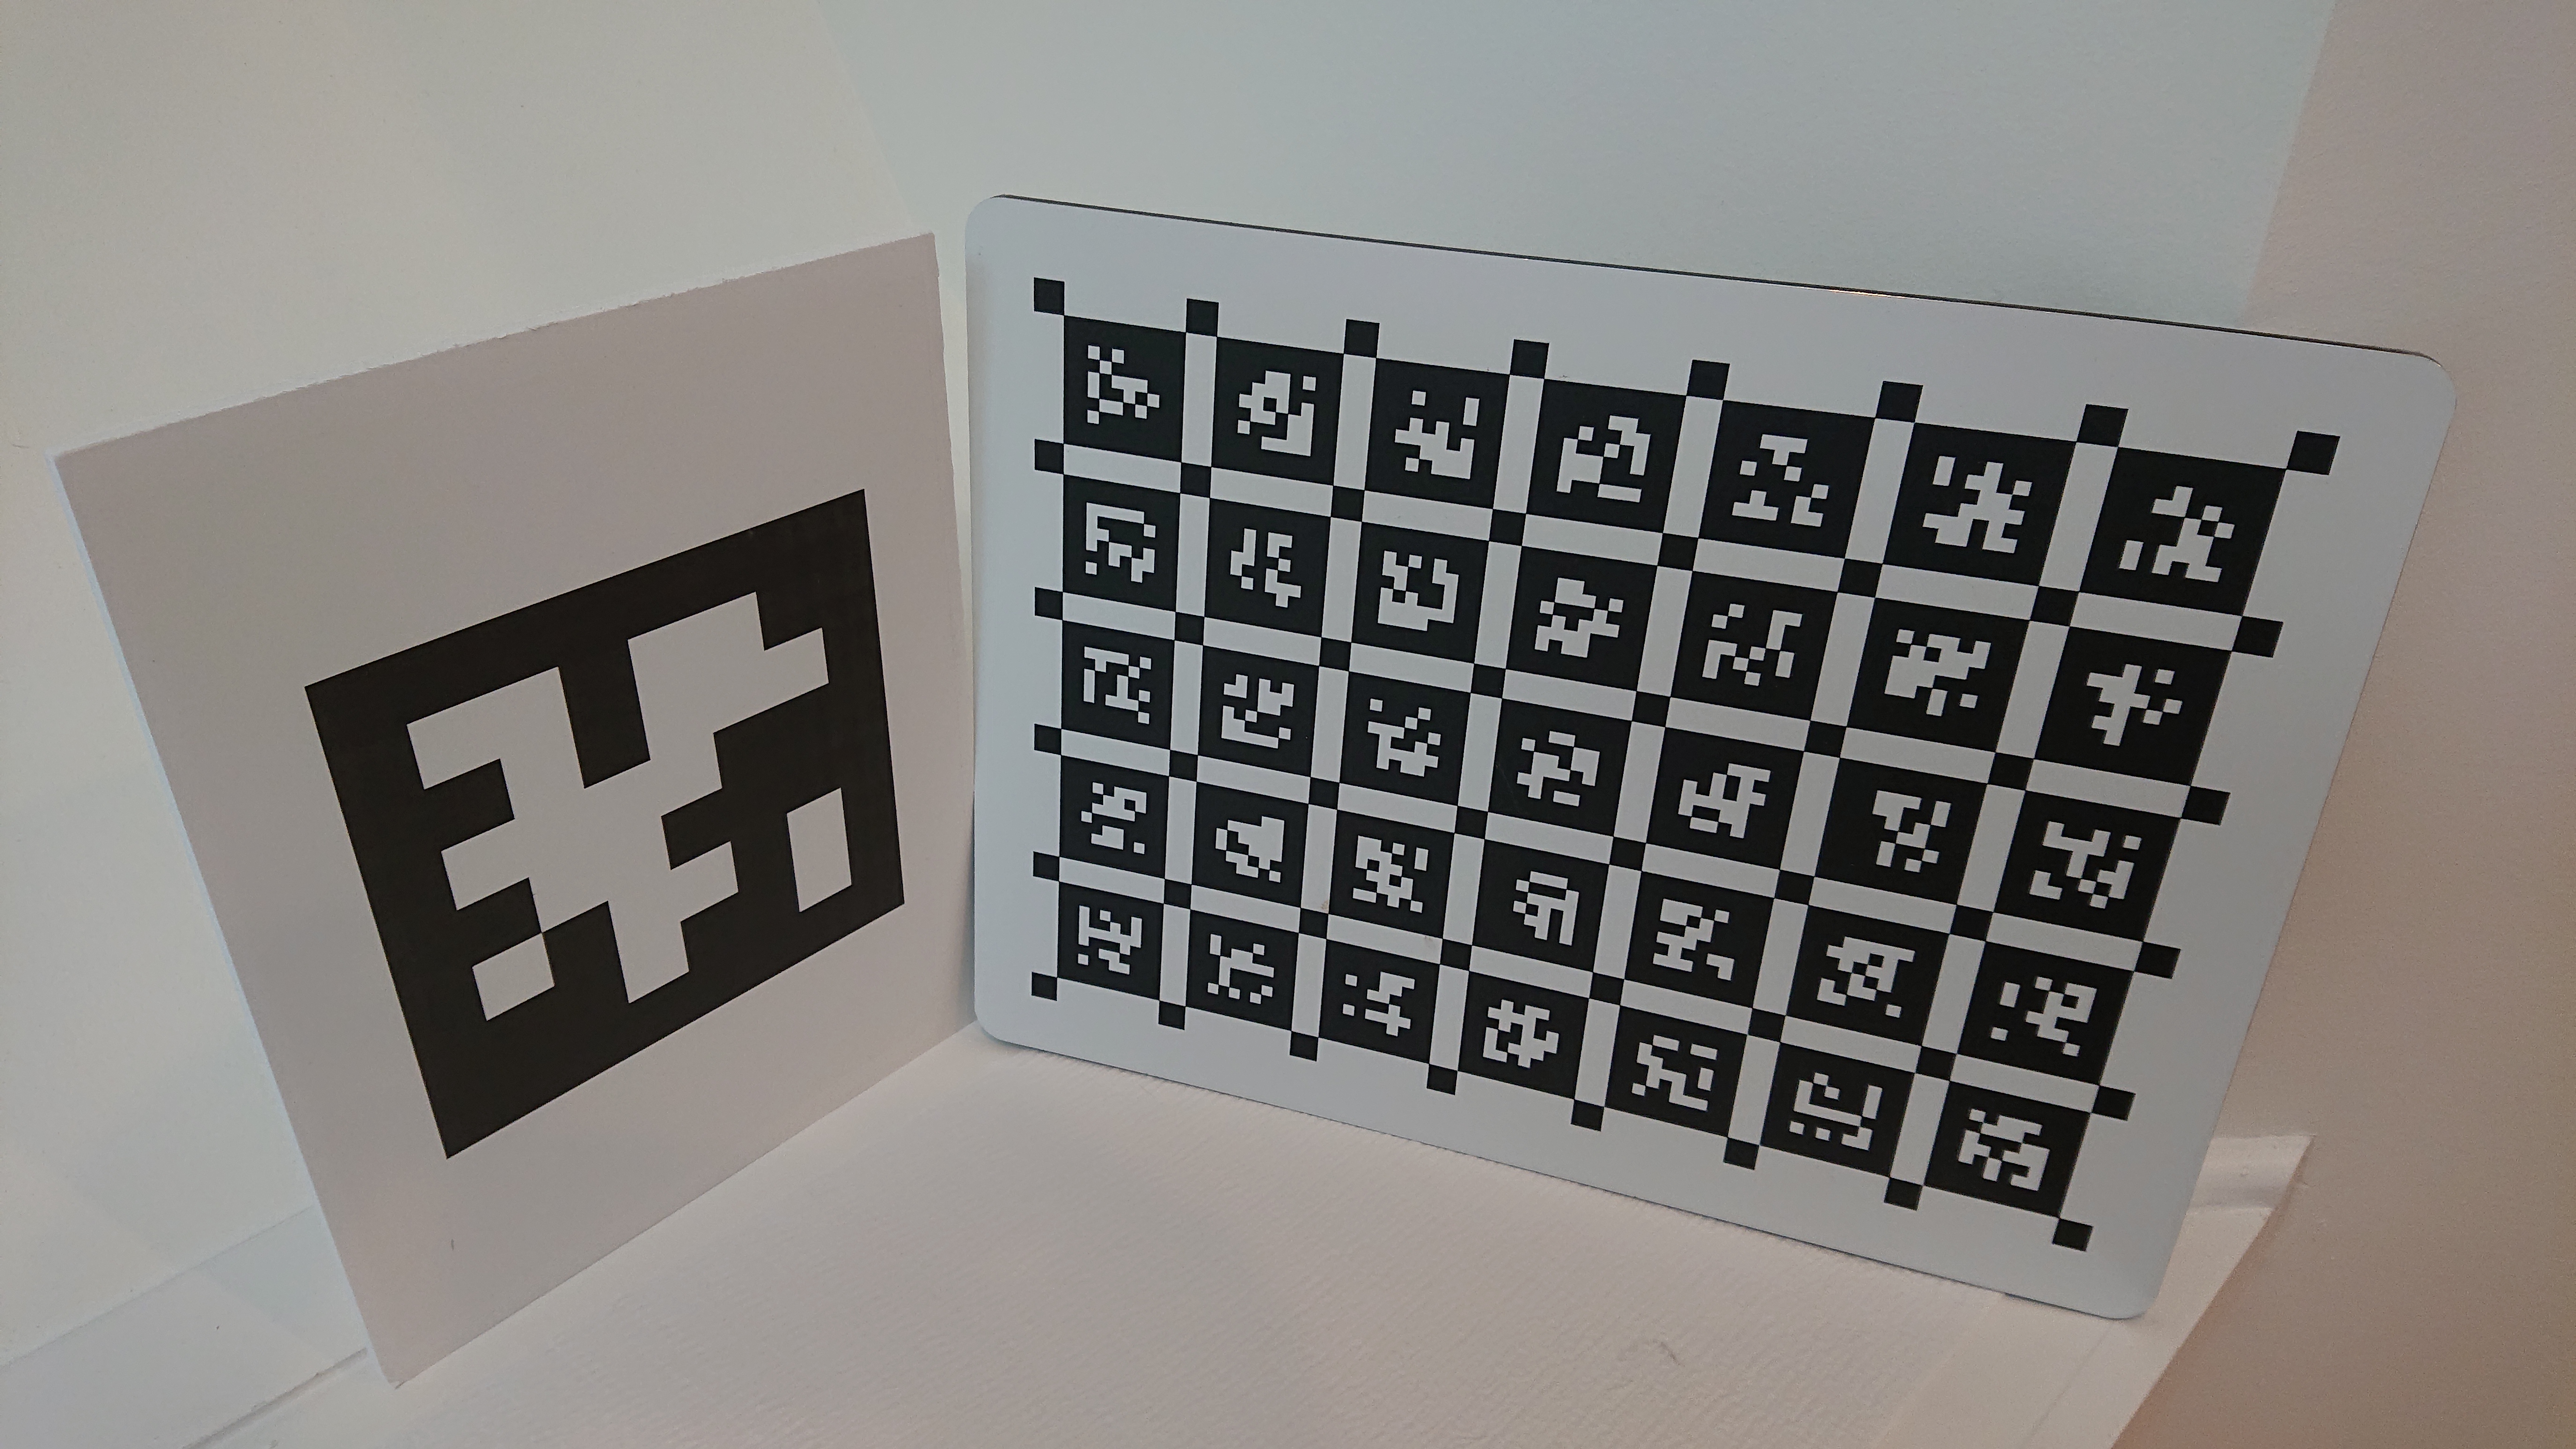
DiBond is also great material for a calibration board that gets heavy use. Due to popular demand, here are links to the front and back of the calibration board in the image. You can use them directly for printing on 1/8"x16"x12” DiBond at FoamCorePrint.com or (if you prefer the thinner board) 1/4"x16"x12” at Printmoz. The last board printed (May 2020) at Printmoz came to \$43.50 including shipping and handling.
Foam core
For a do-it-yourself approach, you can produce tags on foam core board. Avoid the “Readi” board sold by e.g. Dollar Tree stores. It warps badly! Rather get a board of 3/16” ProFoam from Jerry’s Artarama for about \$6, from which you can cut 12 tags of size 10"x10”.
Use an inkjet printer to print the tag on a matte clear adhesive label like the Avery 8665, which go for about \$1.00 for an 8.5"x11” page. Stick the label on the foam board, done. The board is significantly cheaper (about \$1.50/tag DIY, or \$4/tag + shipping if you have it printed) and lighter than DiBond aluminum, but also much more fragile. Be careful not to touch the printed surface, or the color will come off over time.
An even better solution is to use a laser printer and these labels for about \$0.45/sheet.
Paper
OK when used against flat surfaces like walls, or put on the ground. Good for some initial experimentation. Make sure the tag is really not warped, as this will greatly affect the pose estimation.
How to print your own AprilTags
There is a handy little program in the TagSLAM repo (courtesy of the Kalibr folks) with which you can generate a pdf of an AprilTag:
sudo apt install python-pyx
rosrun tagslam make_tag.py --nx 1 --ny 1 --marginx 0.00 --marginy 0.00 --tsize 0.16 --tspace 0.0 --startid 4 --tfam t36h11 --borderbits 1
This will produce a pdf file target.pdf of a single tag with id 4,
size 16cm, and a 1 bit wide border. When you generate tags, you
obviously want to print them as big as possible, but you must leave a
large white frame around the tag! Make it about 2 bits wide (a bit
corresponds to one of the small squares that make up the tag’s
code). The white border around the tag is crucial for detection!
The borderbits parameter determines the size of the black border
on the outside of the AprilTag. You will generally want to use a 1 bit
wide border, although you can see that the calibration board in the
image has tags with 2 bit borders (the corner squares between the tags
are for more accurate localization of the tag corners, TagSLAM is not
using them).
To verify that the tag will actually have the size you want:
pdfinfo target.pdf | grep -n 'Page size'
output:
Page size: 455.543 x 455.543 pts
Divide this by 72 to get the physical size in inches, then multiply by 0.0254 to get meters. In this case it works out to 0.1607, so actually a little off (why???).
Here is an example line for a 4x3 board to be printed on a 14x12 durabond board:
python3 ./make_tag.py --nx 4 --ny 3 --tsize 0.07 --tspace 0.25 --borderbits 1 --marginx 0.036598 --marginy 0.0295473 --draw_box --no-symm_corners